
The Pixelbook Go
 31 Dec 2025
An introduction
So, since it was released in 2019, I have always found its design to be interesting, but it had the drawback of running ChromeOS exclusively.
If you happened to live under a rock up until now, and don’t know what ChromeOS is, basically it’s an OS made by Google with a simple concept in mind: you turn on your computer and you open Chrome. And that’s it.
No desktop applications, just Chrome (and web applications).
The philosophy of Chrome devices is to keep most of your data stored in the “cloud”, and they are made to be as cheap as possible. This means that generally:
- everything is plastic
- the screen sucks
- the processor sucks too
- you have very little storage
- the RAM is also very limited
Apparently, these devices are very popular for school usage in the US (because you only really need a web browser in that case), and in general the targets of this OS are the people that only really use their computer as a bootloader for a web browser.
There are also some “premium” devices with a better build quality, a better screen and better onboard resources. They also cost like actual computers, but with a sub-optimal OS, which is unsuitable for anybody who actually uses their computers.
To be fair, Google actually made some improvements to the overall UX, by allowing the installation of Android apps (only on some officially licensed devices tho) and Linux desktop applications through Crostini, which is basically Google’s equivalent of WSL (with all of its inconveniences). Also, there were some efforts by Valve to port Steam on ChromeOS, but in pure Google fashion this won’t be available anymore since… next month.
So let’s say that you manage to use it in some way as a daily driver, even with these limitations; there are a few things that you’ll certainly find annoying if you kinda know how to use computers:
- Thou shalt have no other browsers before Chrome (no, seriously, the full spyware package with no degoogling allowed). Want to use Firefox instead? You are out of luck
- Mandatory online account to have any persistence on the internal drive (you can log in as a guest, but the entire session is ephemeral)
- Planned obsolescence: there is an expiration date for every ChromeOS device, after which you won’t receive any other Chrome updates, leaving you with an unsafe OS. And knowing that this is running Gentoo under the hood, I find this to be especially insulting, because it’s not like it’s impossible for them to update Chrome for Linux or the Linux userspace. Your other alternative would be installing ChromeOS Flex, which has significant limitations (i.e. no Android apps) and limited hardware support.
So, knowing all that, there is no way that a tech savy user would want to buy such a device. Especially since you can’t really evict Google from the device… right?
Right?
The eviction
It turns out that besides using Gentoo under the hood, Google also uses Coreboot as the firmware (a downstream fork, to be precise). So, a Coreboot lead developer started to maintain a fork for Chromebooks, which can be installed on many compatible devices (x86 only, no ARM support unfortunately).
This would turn any Chromebook into a normal computer, and would allow to install any Linux distro and to actually do anything you want with your computer.
You can also keep the stock firmware and boot alternative OSes even on ARM devices with the developer mode (and some stupid limitations): this is what can be done for installing PostmarketOS on certain ARM devices, but that’s another story.
You can find more detailed information about all this on the official website, mrchromebox.tech.
After watching this video of a Pixelbook with Linux, and this video by Brodie Robertson some time ago, and doing some research on my own on the topic, I decided that I would try to tinker with a Chromebook whenever I had the opportunity to put my hands on one of those.
The device
Fast-forward to this year, I wanted to self-gift me something for my birthday. So what better idea than opening Ebay and start searching for strange devices to install Arch BTW Linux on?
My initial idea was to look for a Pixelbook, just like the video that I saw some years ago
![]() Image from Google
Image from Google
This is a convertible device from 2017, and it also cost way more at launch than the Pixelbook Go, so the prices on Ebay were always a bit high (> €400).
You could also specifically search for very low-end ChromeOS devices and do some cool efficient setups, but I wanted something more usable as a daily driver.
Still on Ebay, I found other listings of other “premium” devices in the €300-€400 price range, but I wanted to see if I could find something cheaper, so I continued searching.
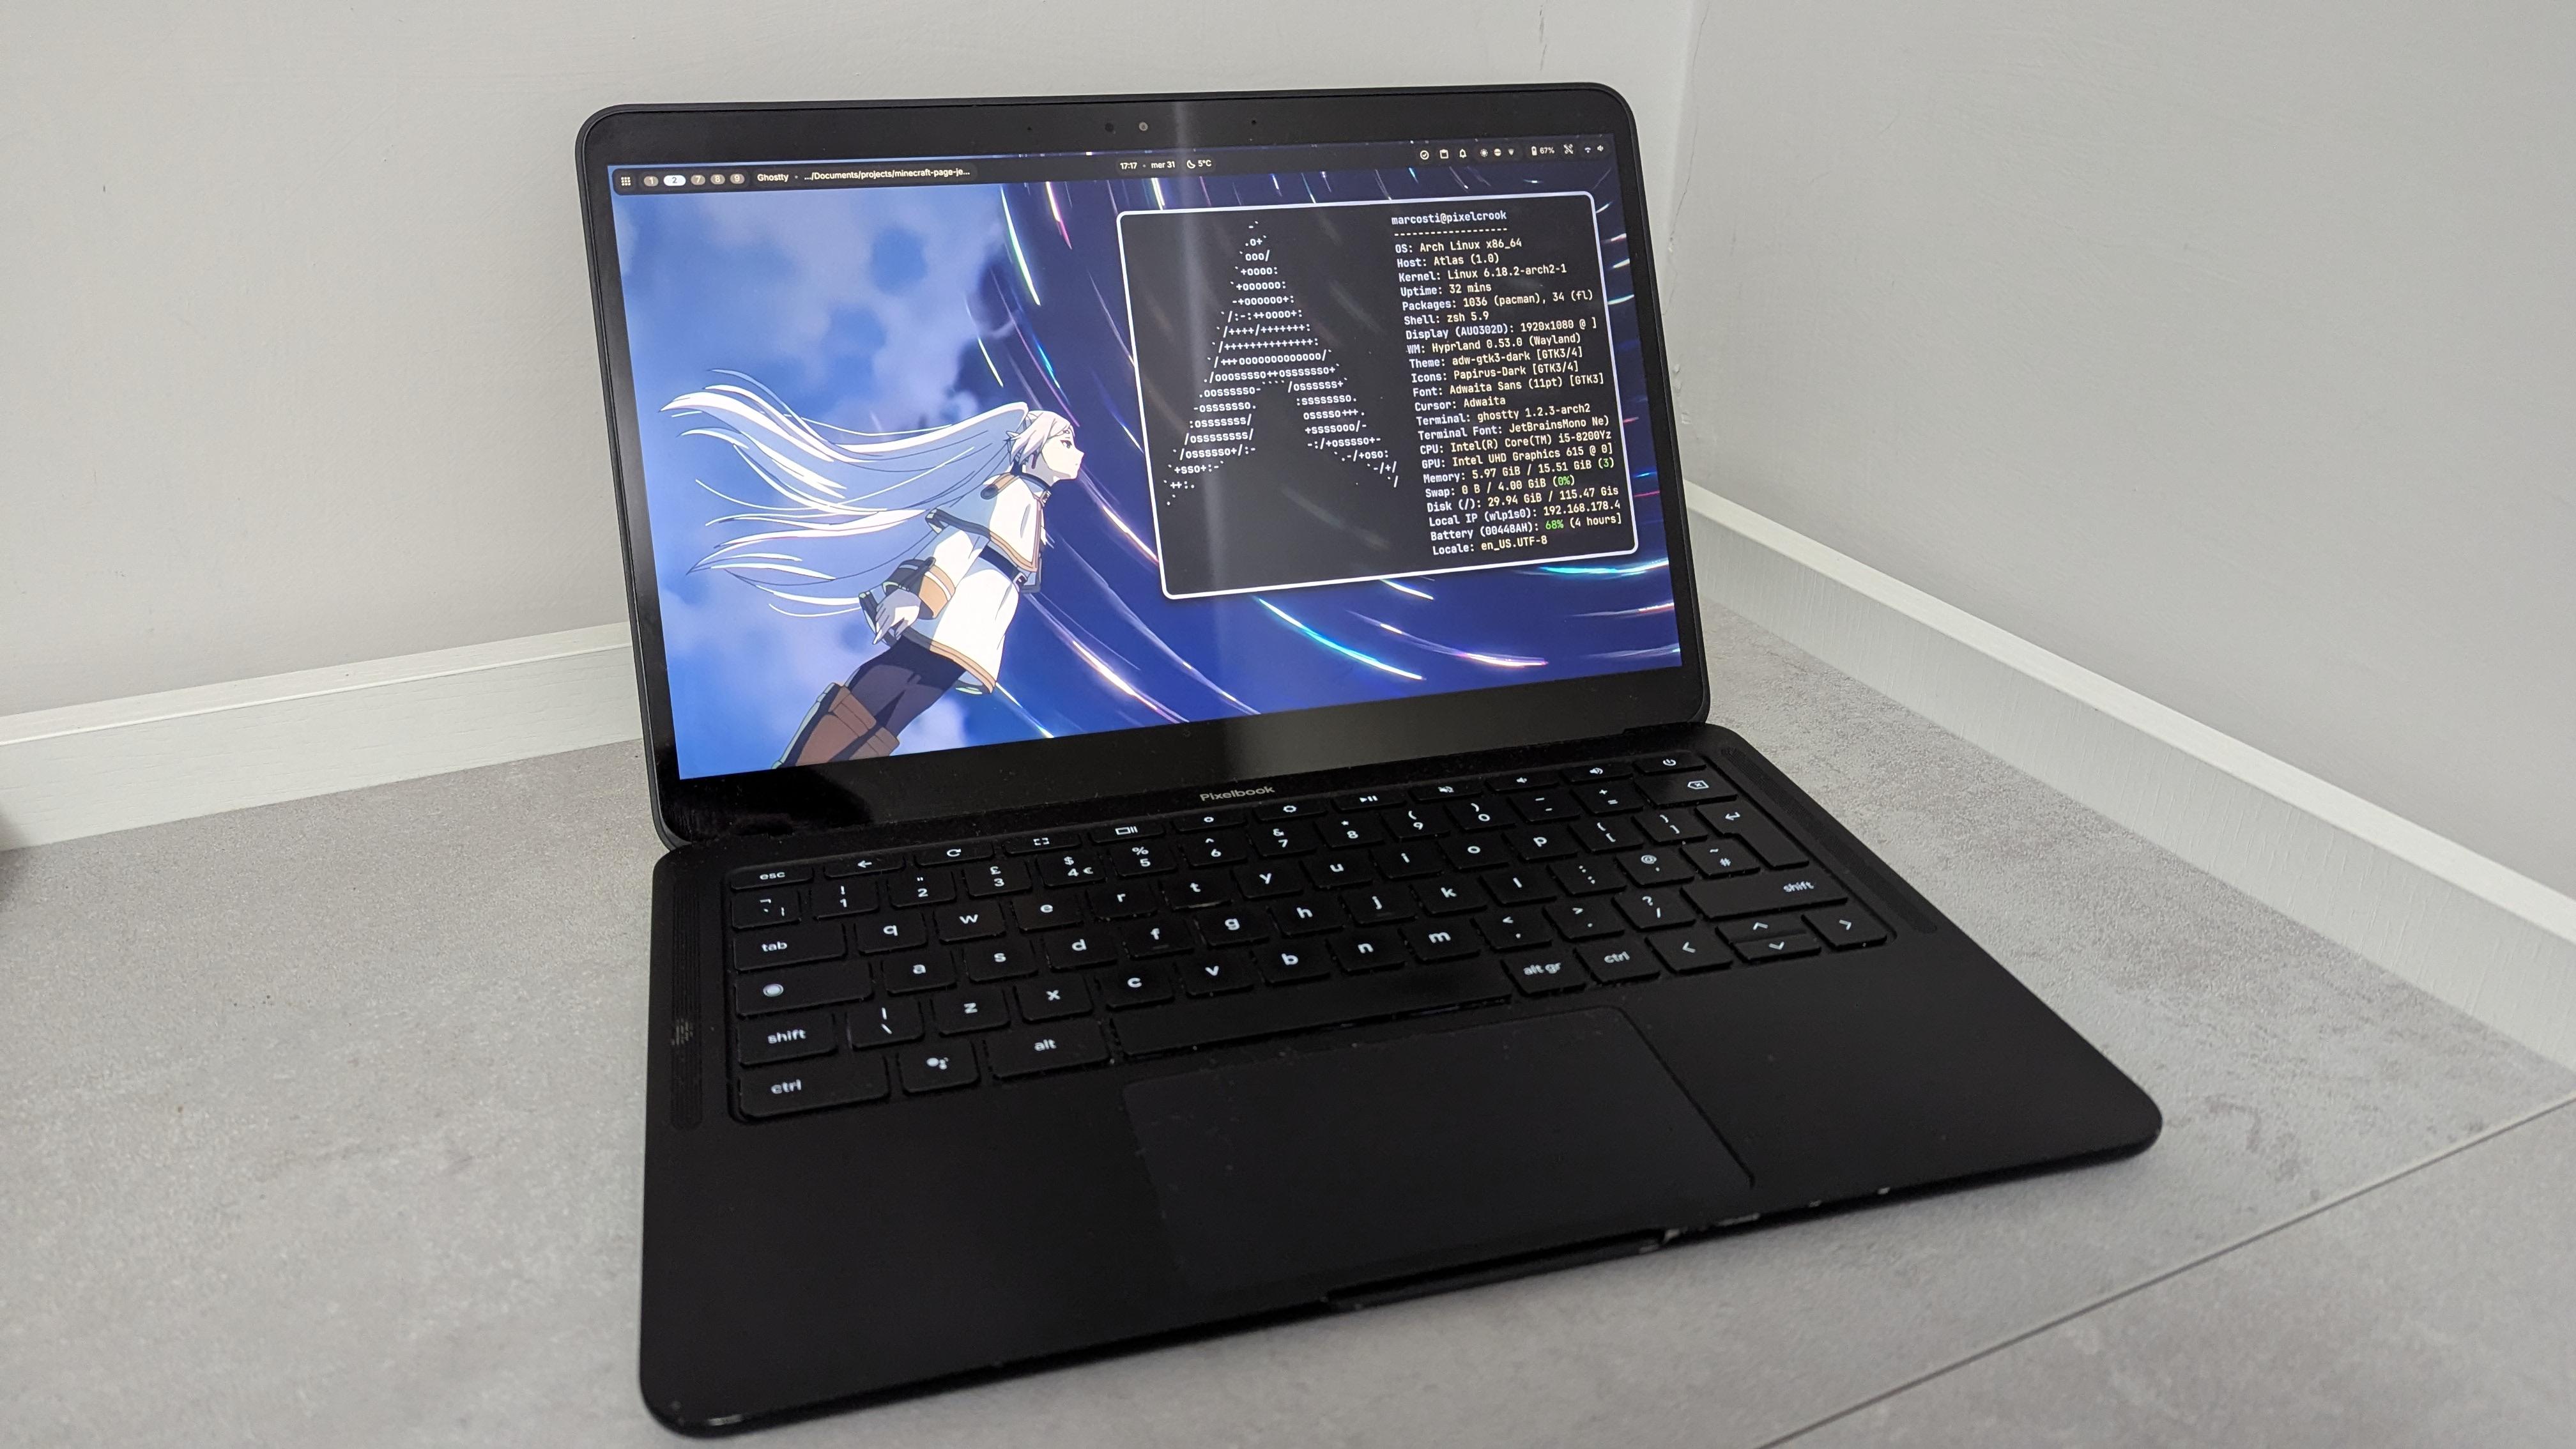
I ended up finding a used Pixelbook Go on Vinted for €150, with an i5-8200Y, 128GB of eMMC storage (which is not ideal but not that bad) and 16GB of RAM (instead of the more expensive devices found on Ebay with half of the RAM).
After doing some digging about the hardware support and on the procedure, I bought it.
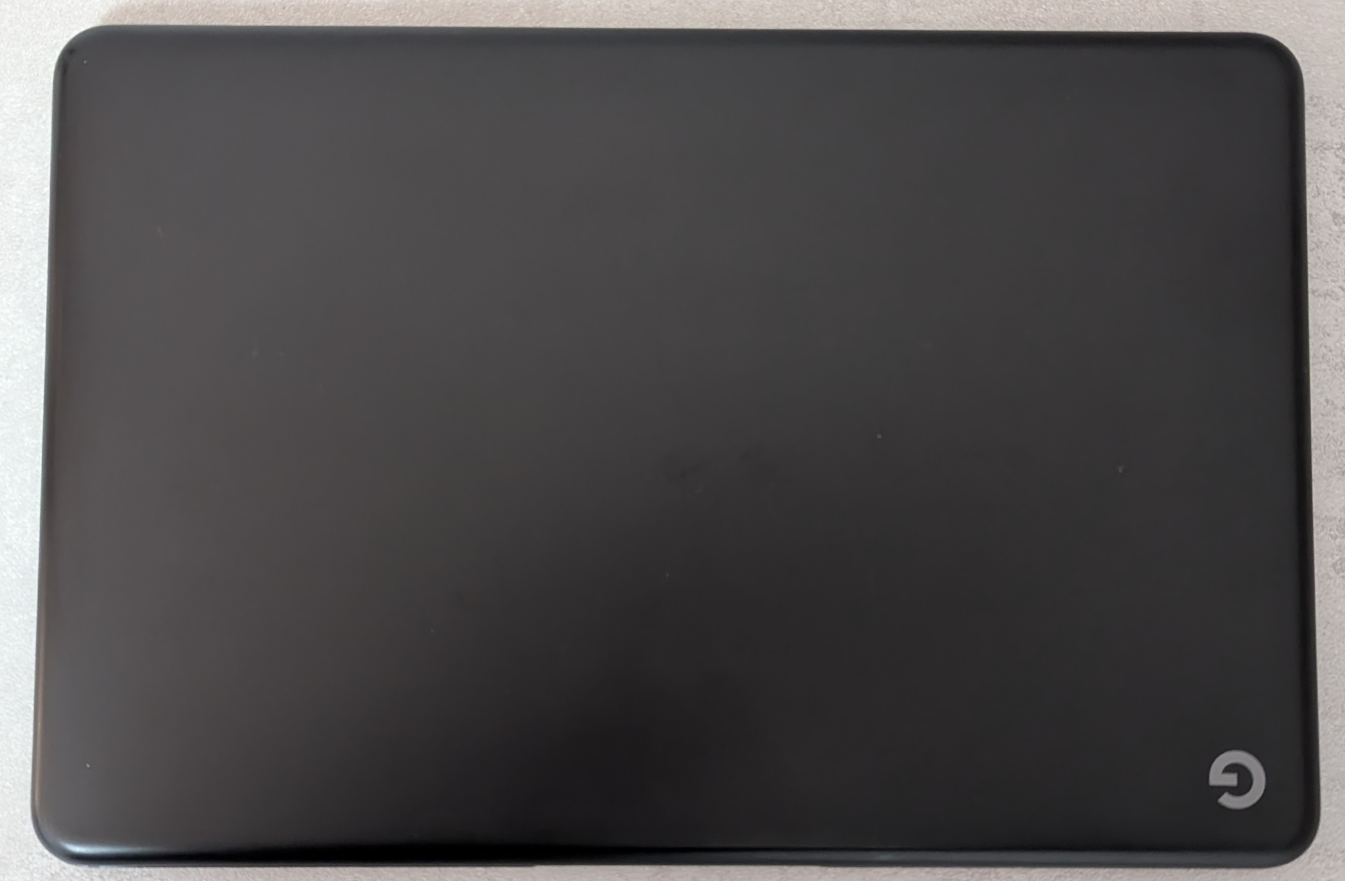
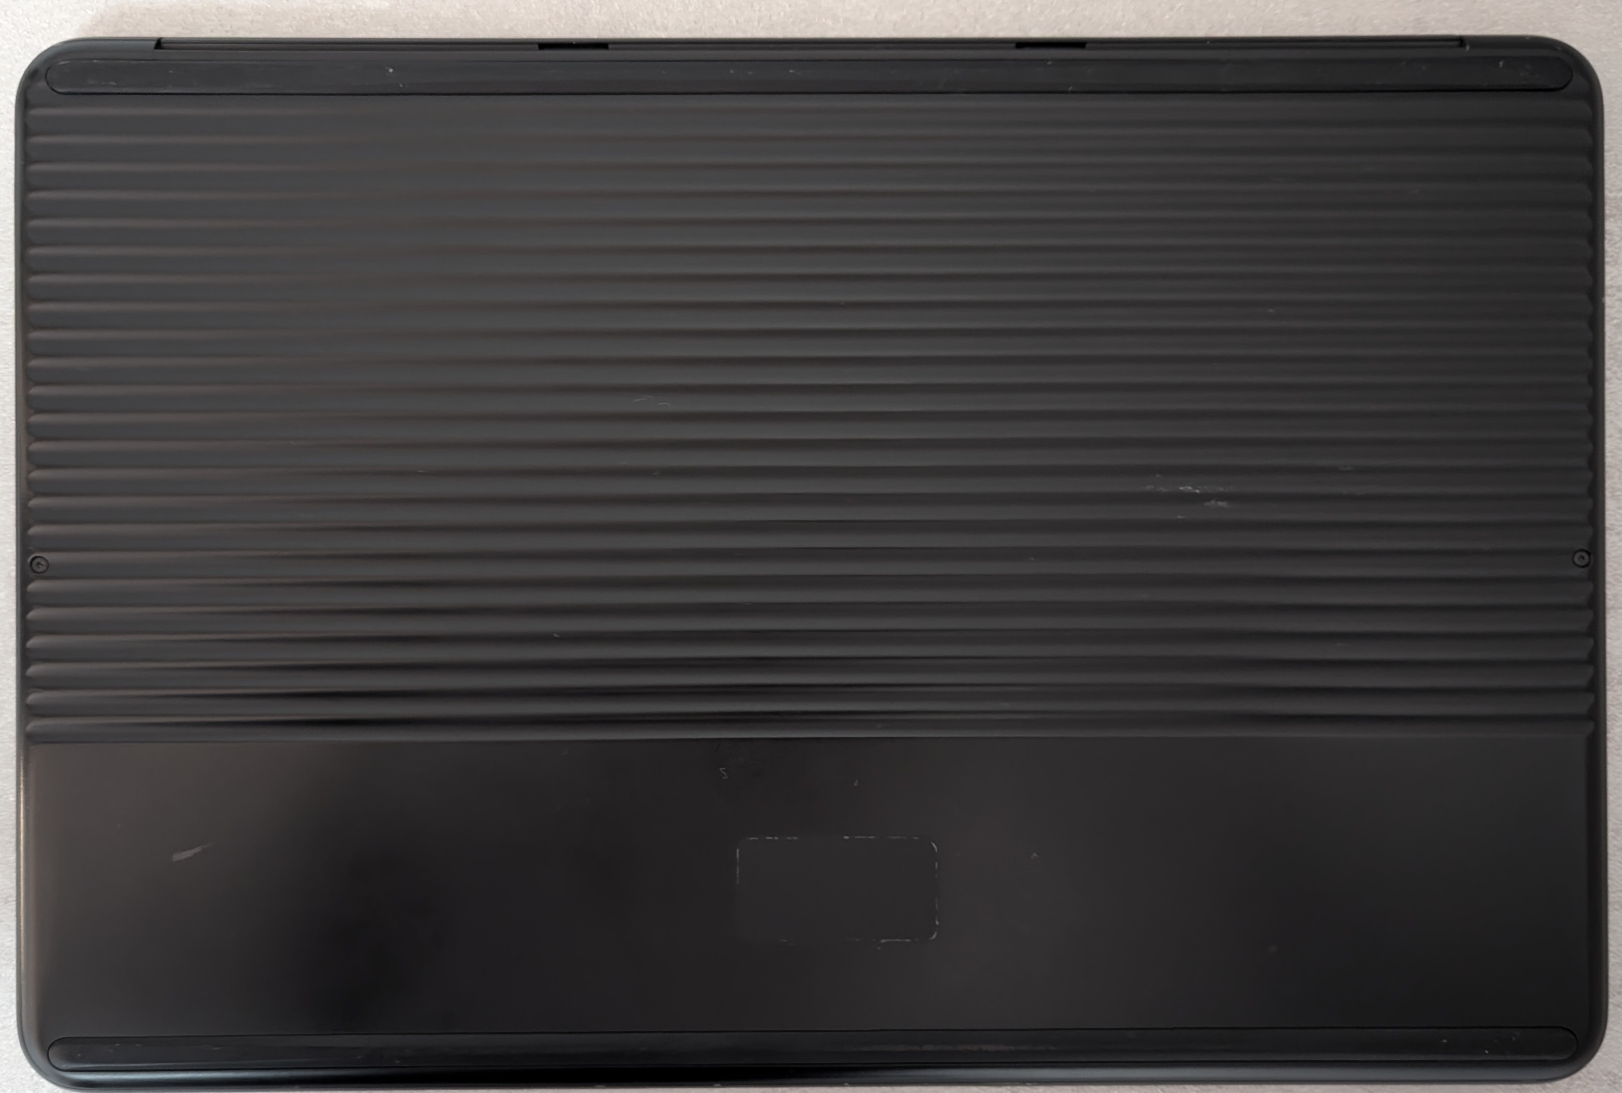
It has a nice magnesium chassis and it’s also quite light
It has a 13” FHD display, 2 USB-C ports and a headphone jack (unexpected). The speakers are also pretty decent, especially when compared to other laptop speakers (like the ones in my Thinkpad T490).
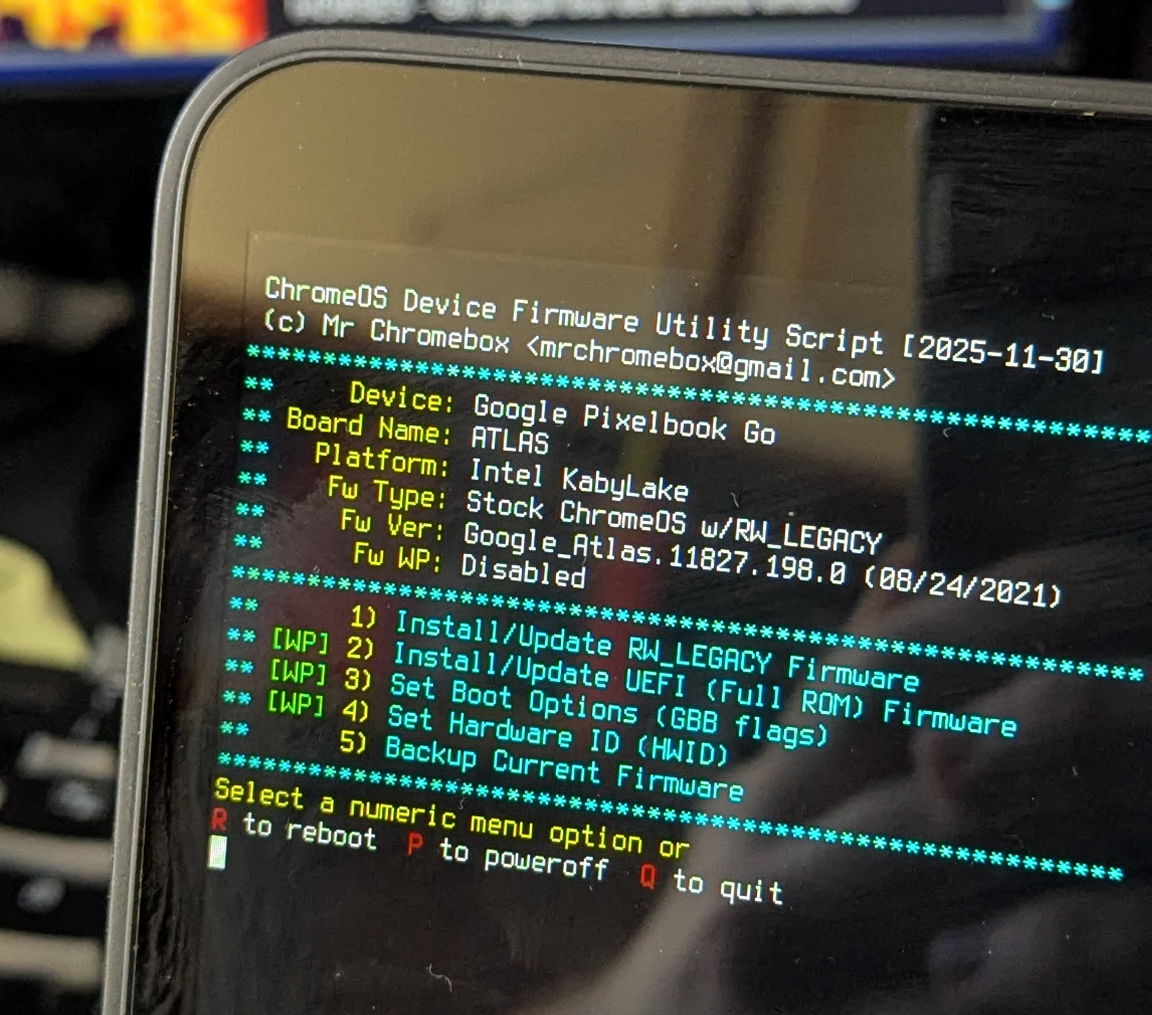
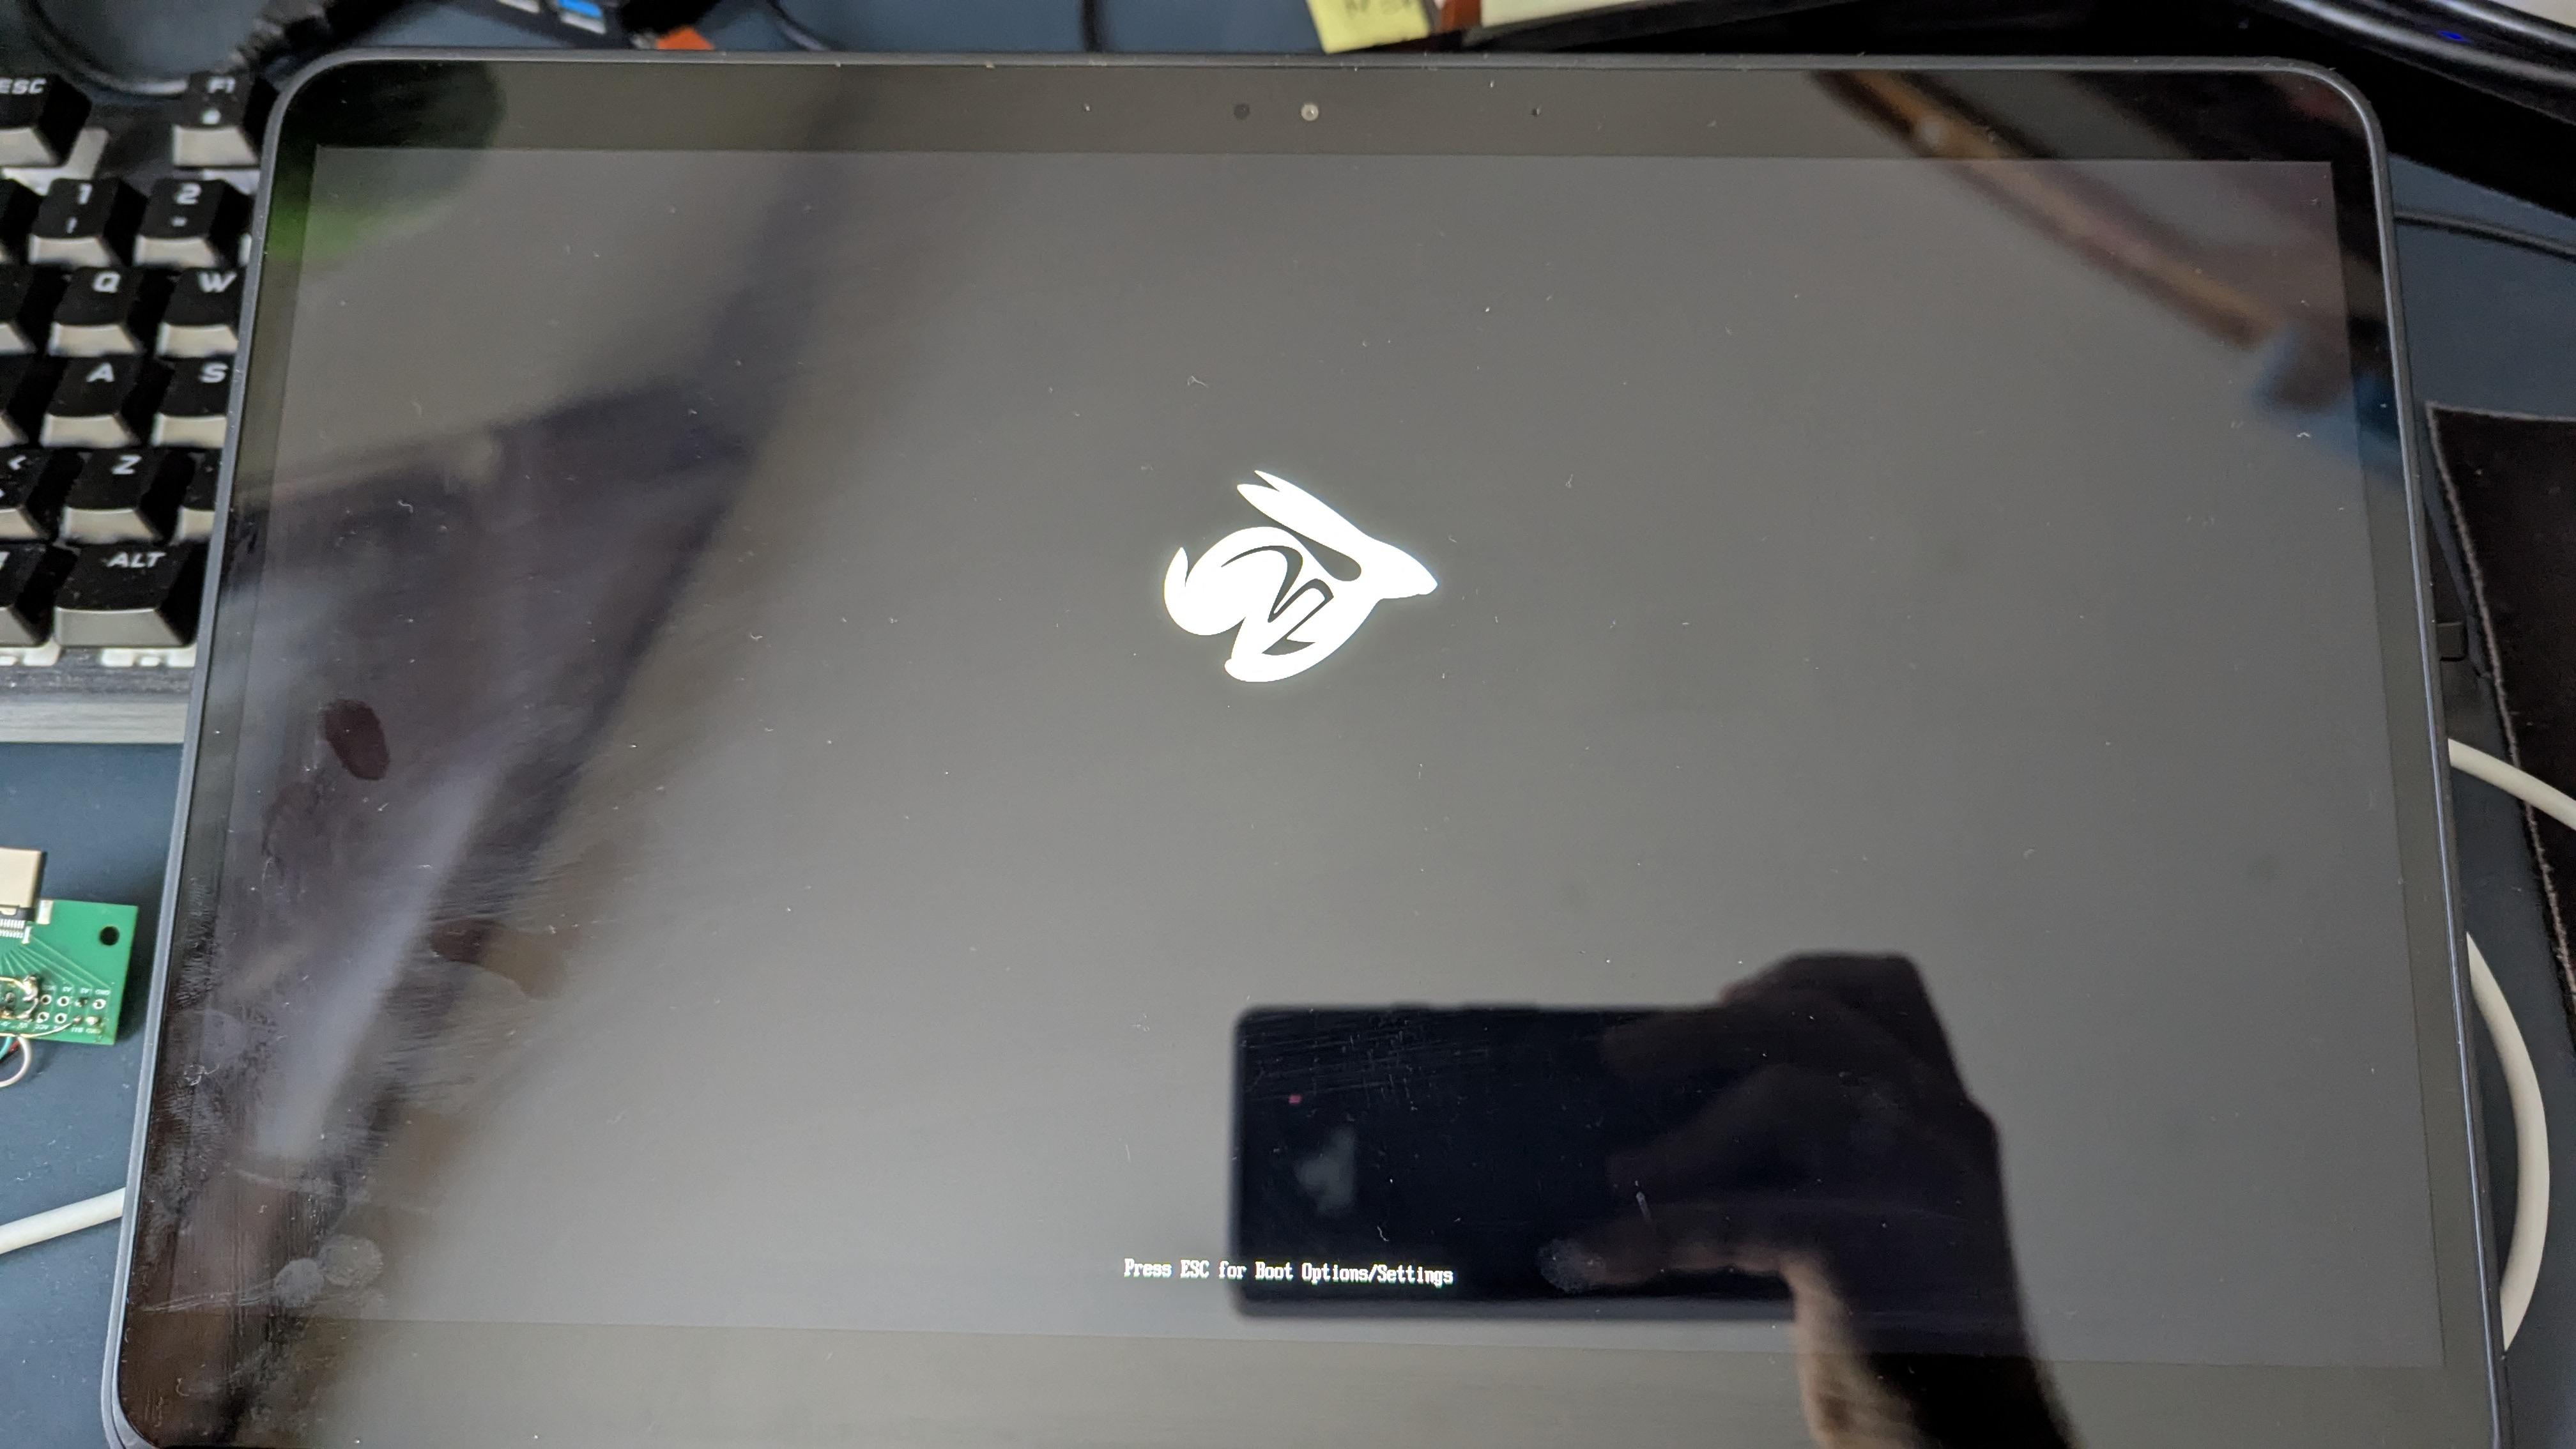
Installing MrChromebox’s Coreboot
Now, you might be wondering how the procedure for installing Coreboot is like: the first step is to disable the write protection of the SPI flash chip containing the firmware.
Depending on the device there are various ways to disable the firmware write protection:
- unscrewing a special screw on the motherboard
- bridging a jumper on the mobo
- unplugging the battery
- closed-case debugging with a special “Suzy-Q” cable
- other jankier ways like soldering jumpers to the SPI chip directly like in this video
On this device in particular I could either remove the battery or use the Suzy-Q cable. The problem with opening this device is that the screws are under two rubber strips that I had no desire of gluing back to the device lol.
The Suzy-Q method didn’t require to disassemble the device (and it also makes recovery in the event of a brick way less painful), so that was my preferred option.
So the first thing to do is to get my hands on a Suzy-Q
 Image from jojowiki.com
No, not that one lol
It’s a cable originally made by sparkfun, but is no longer produced since 2021

But the thing is that, in its core, this cable is basically just two resistors and some jumper wires. So I ordered a USB-C breakout board and a sacrificial USB cable off of AliExpress to craft my own cable.
After three painful weeks of waiting, I got my breakout board and I was ready to start crafting!
Crafting the Suzy-Q cable
From the official specification from Google:
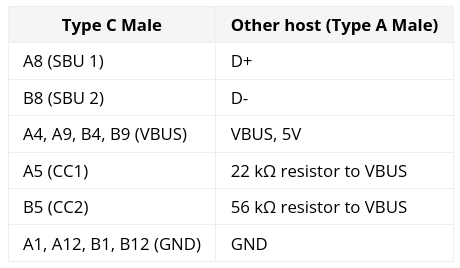
I started by taking a look at the USB-C male pinout
 Image from allaboutcircuits.com
and I immediately noticed a thing about my breakout board
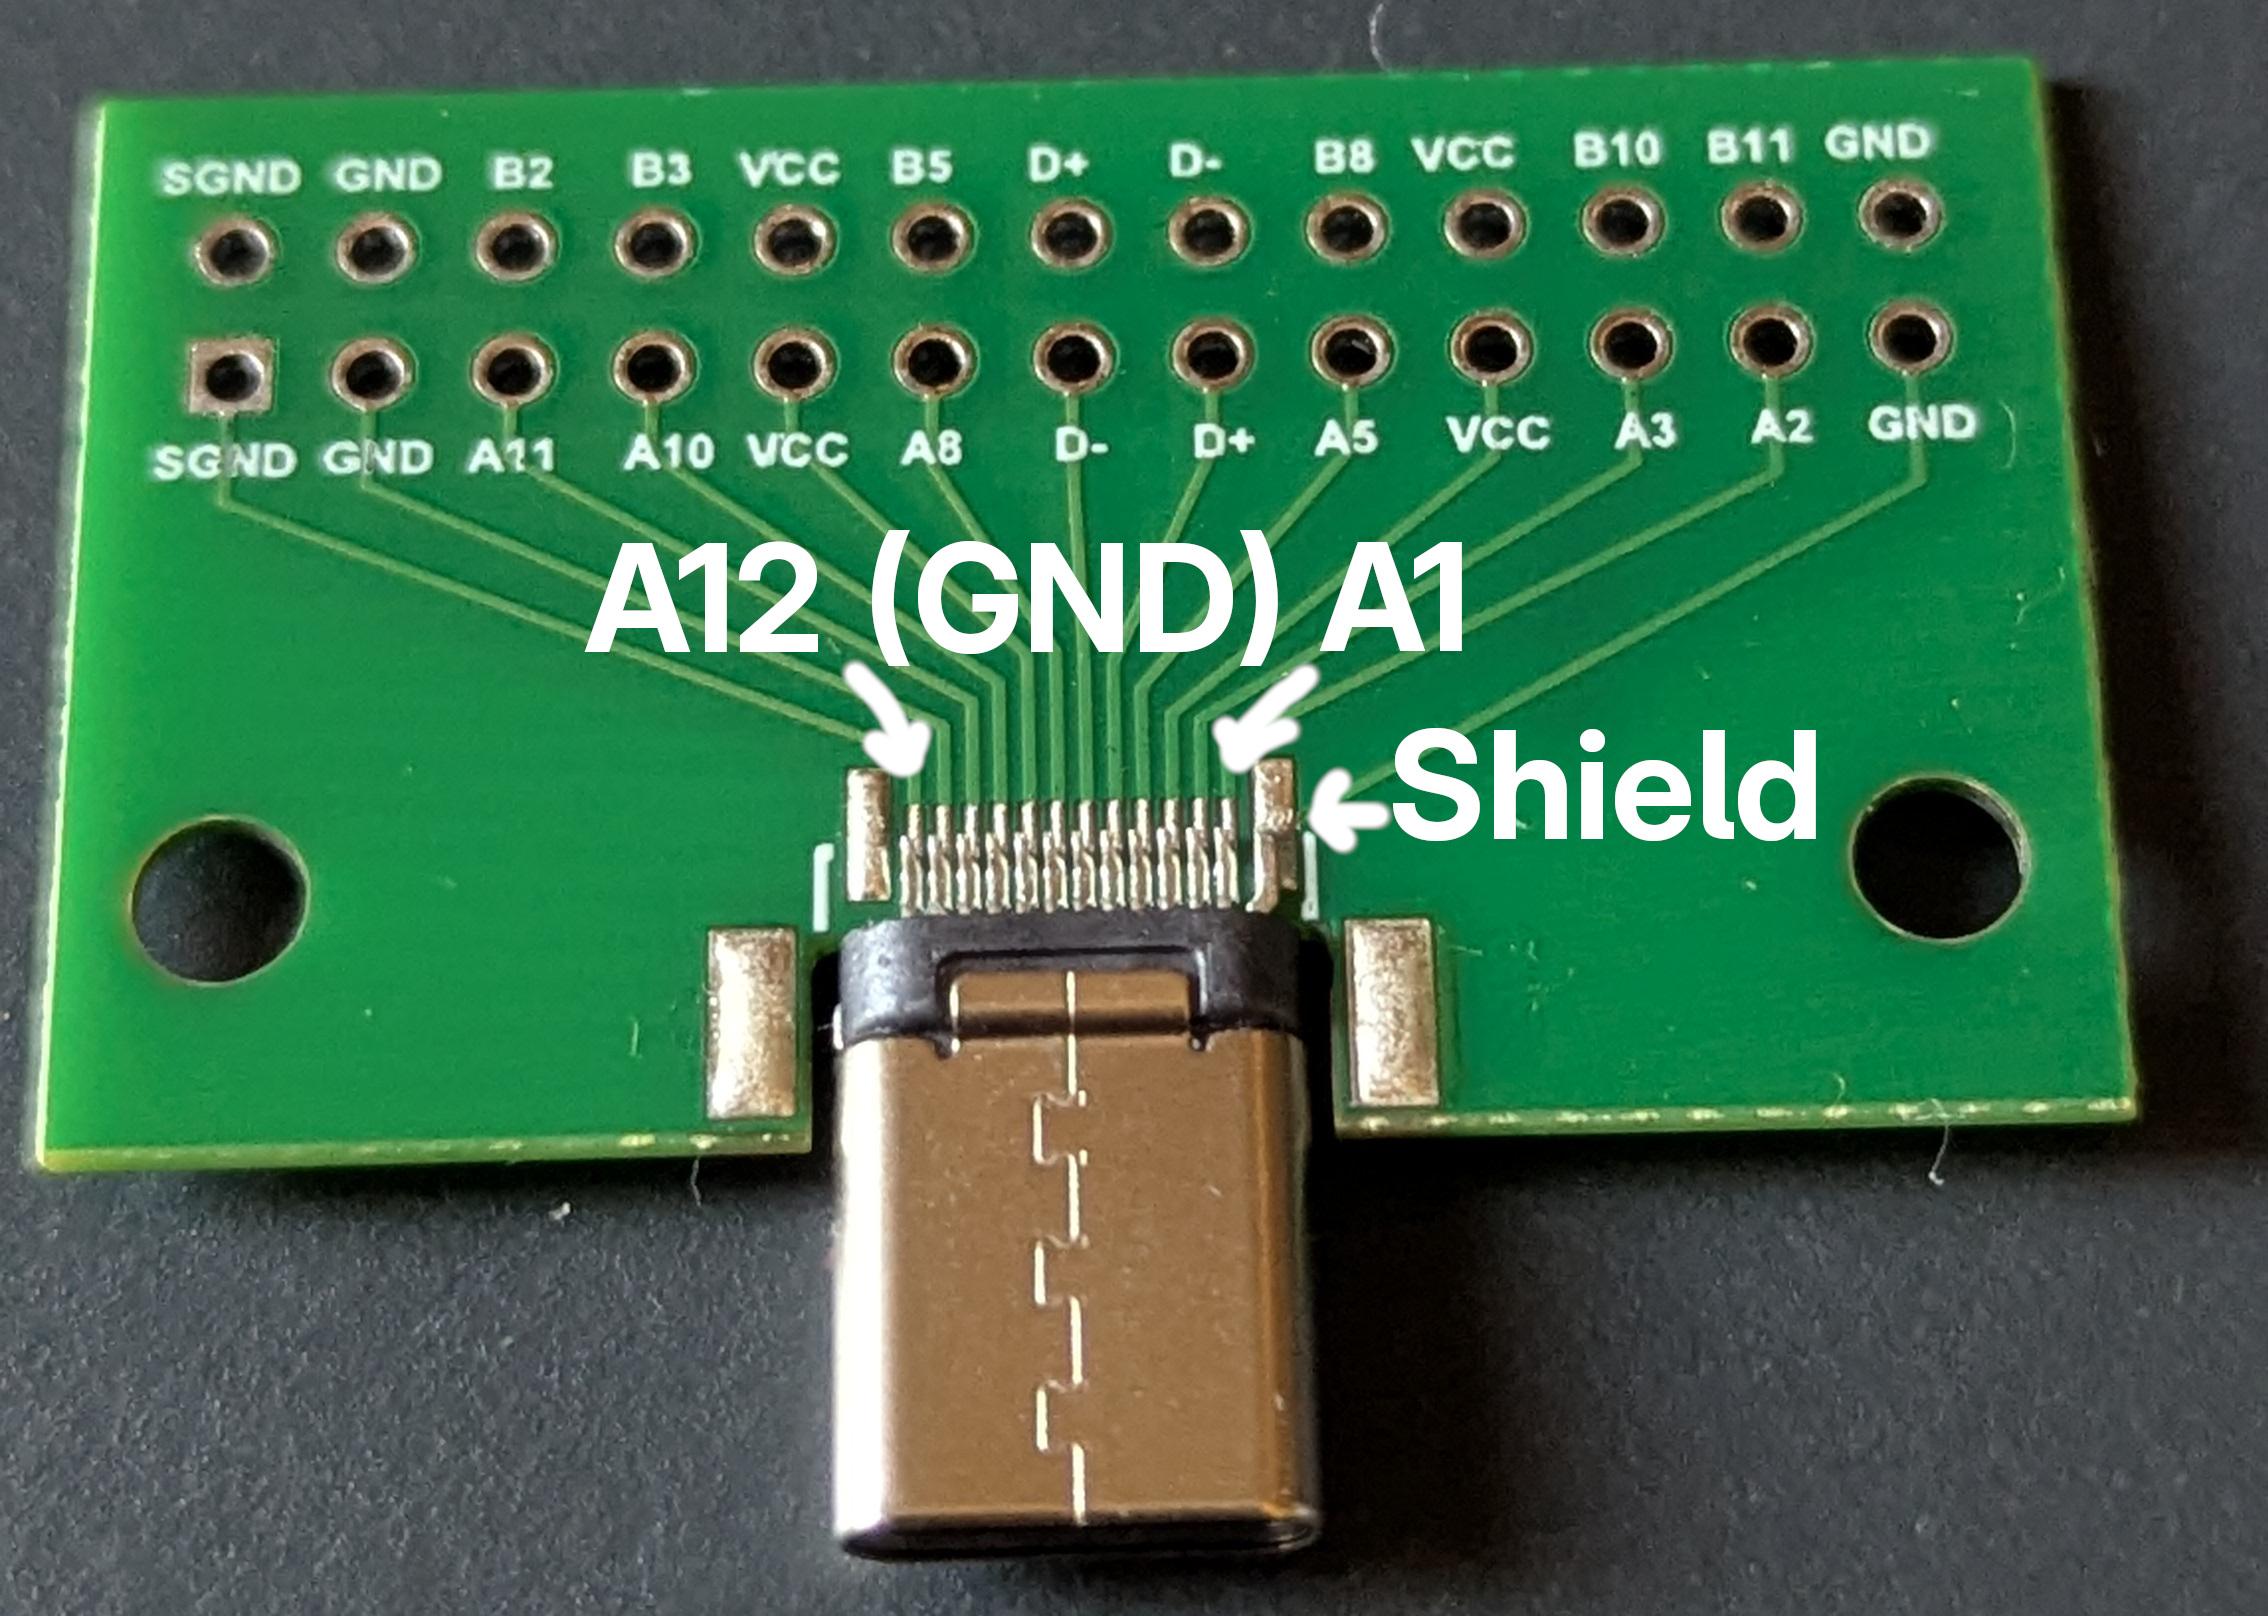 Yes, all the labels on the silkscreen are shifted by one position to the right. And just to be safe I spent the following 20 minutes probing the USB-C connector under a microscope to be sure that there weren’t any other mistakes in the silkscreen (other than the mirrored text on the other side of the board lol).
After those funny realizations, I cut the sacrificial cable and started crafting:
- solder D+ to A8
- solder D- to B8
- solder the 22k resistor between A9 and A5
- solder cable VBUS to A4
- solder the 56k resistor between B5 and B9
- bridge all VBUS pins with resistor reophores
- solder cable GND to B1
- bridge all GND pins with pieces of resistor reophores soldered together lol

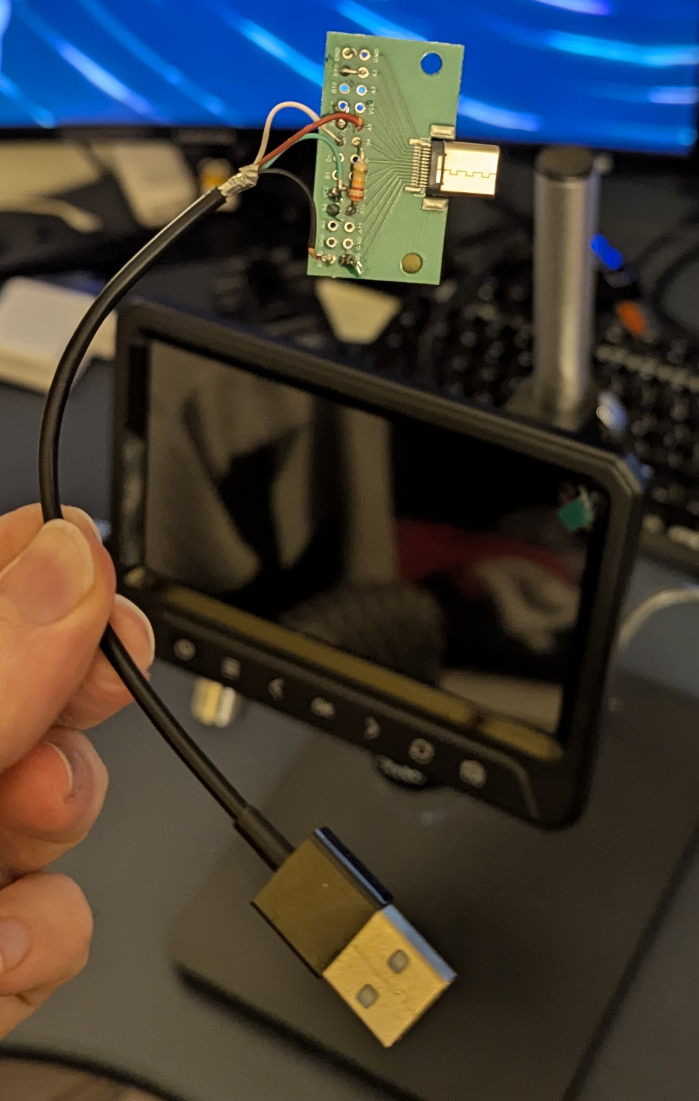
And this is the final result
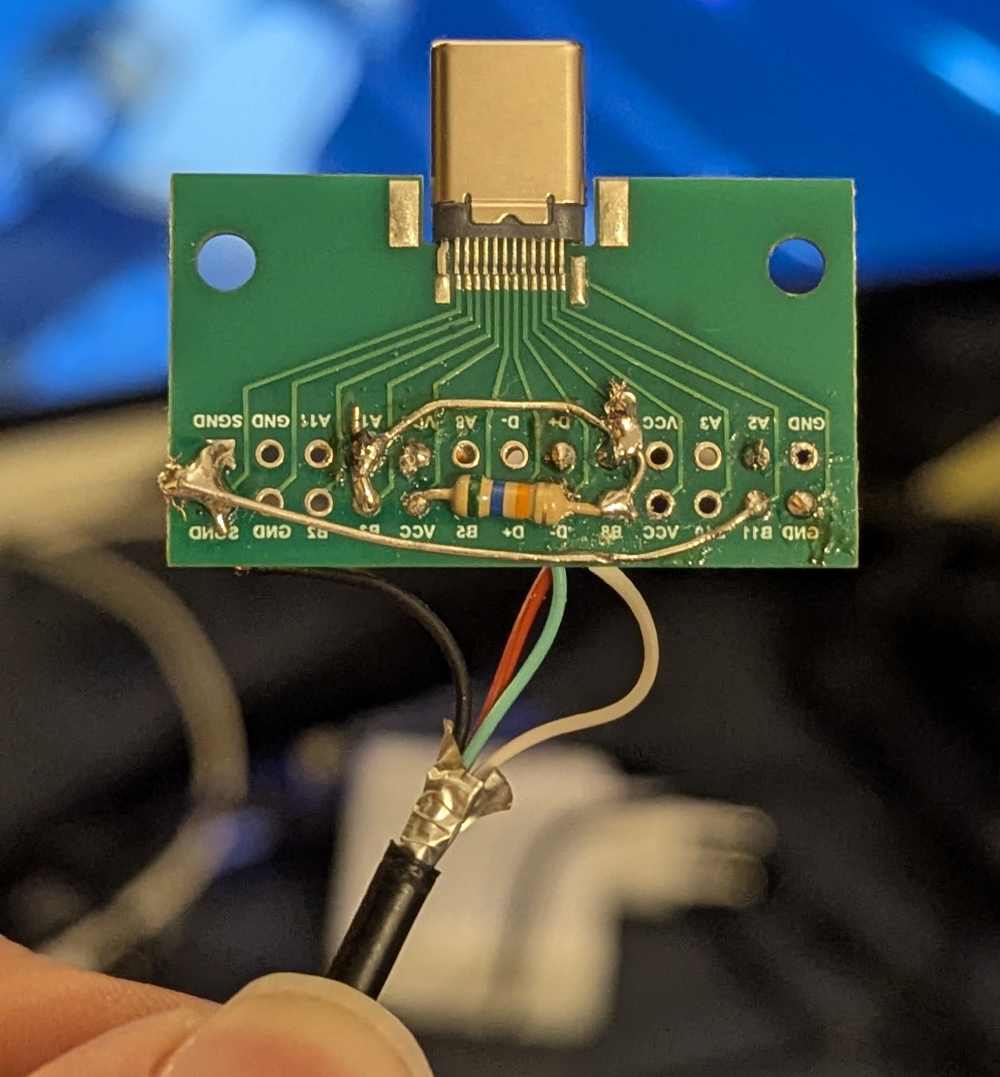 (and yes, as you can probably notice, the wrong silkscreen labels for GND actually got me, so I also had to do some fixing at the end)
And after fiddling a bit with the cable (because it works in only one orientation, as it’s not symmetric)…
 IT WORKED FIRST TRY!
Yes, the solder job is obnoxious and D+ is dangerously close to B5 (and yes, I carefully probed for continuity all the connections to make sure that there weren’t unwanted shorts), but it definitely works!
Now I was finally ready to disable the firmware write protection with my magnificent cable!
At this point it was just a matter of following some instructions and flashing the replacement firmware.
Arch BTW
At this point this computer is a normal computer, I took my holy repair USB drive with Ventoy and an Arch iso and I installed Arch BTW Linux.
For the OS post-installation phase (keyboard and speakers setup) it was sufficient to follow the instructions over at the chrultrabook website.
For the keyboard I actually had to tinker a little bit with the keyd configuration file and with hwdb.
The Pixelbook Go keyboard, differently from other Chromebooks, has a standard ISO layout, because it has an additional “Google Assistant key”, which works fine as a Super key, and the physical Super key (that is in place of the Caps Lock key) can then be remapped to Caps Lock.
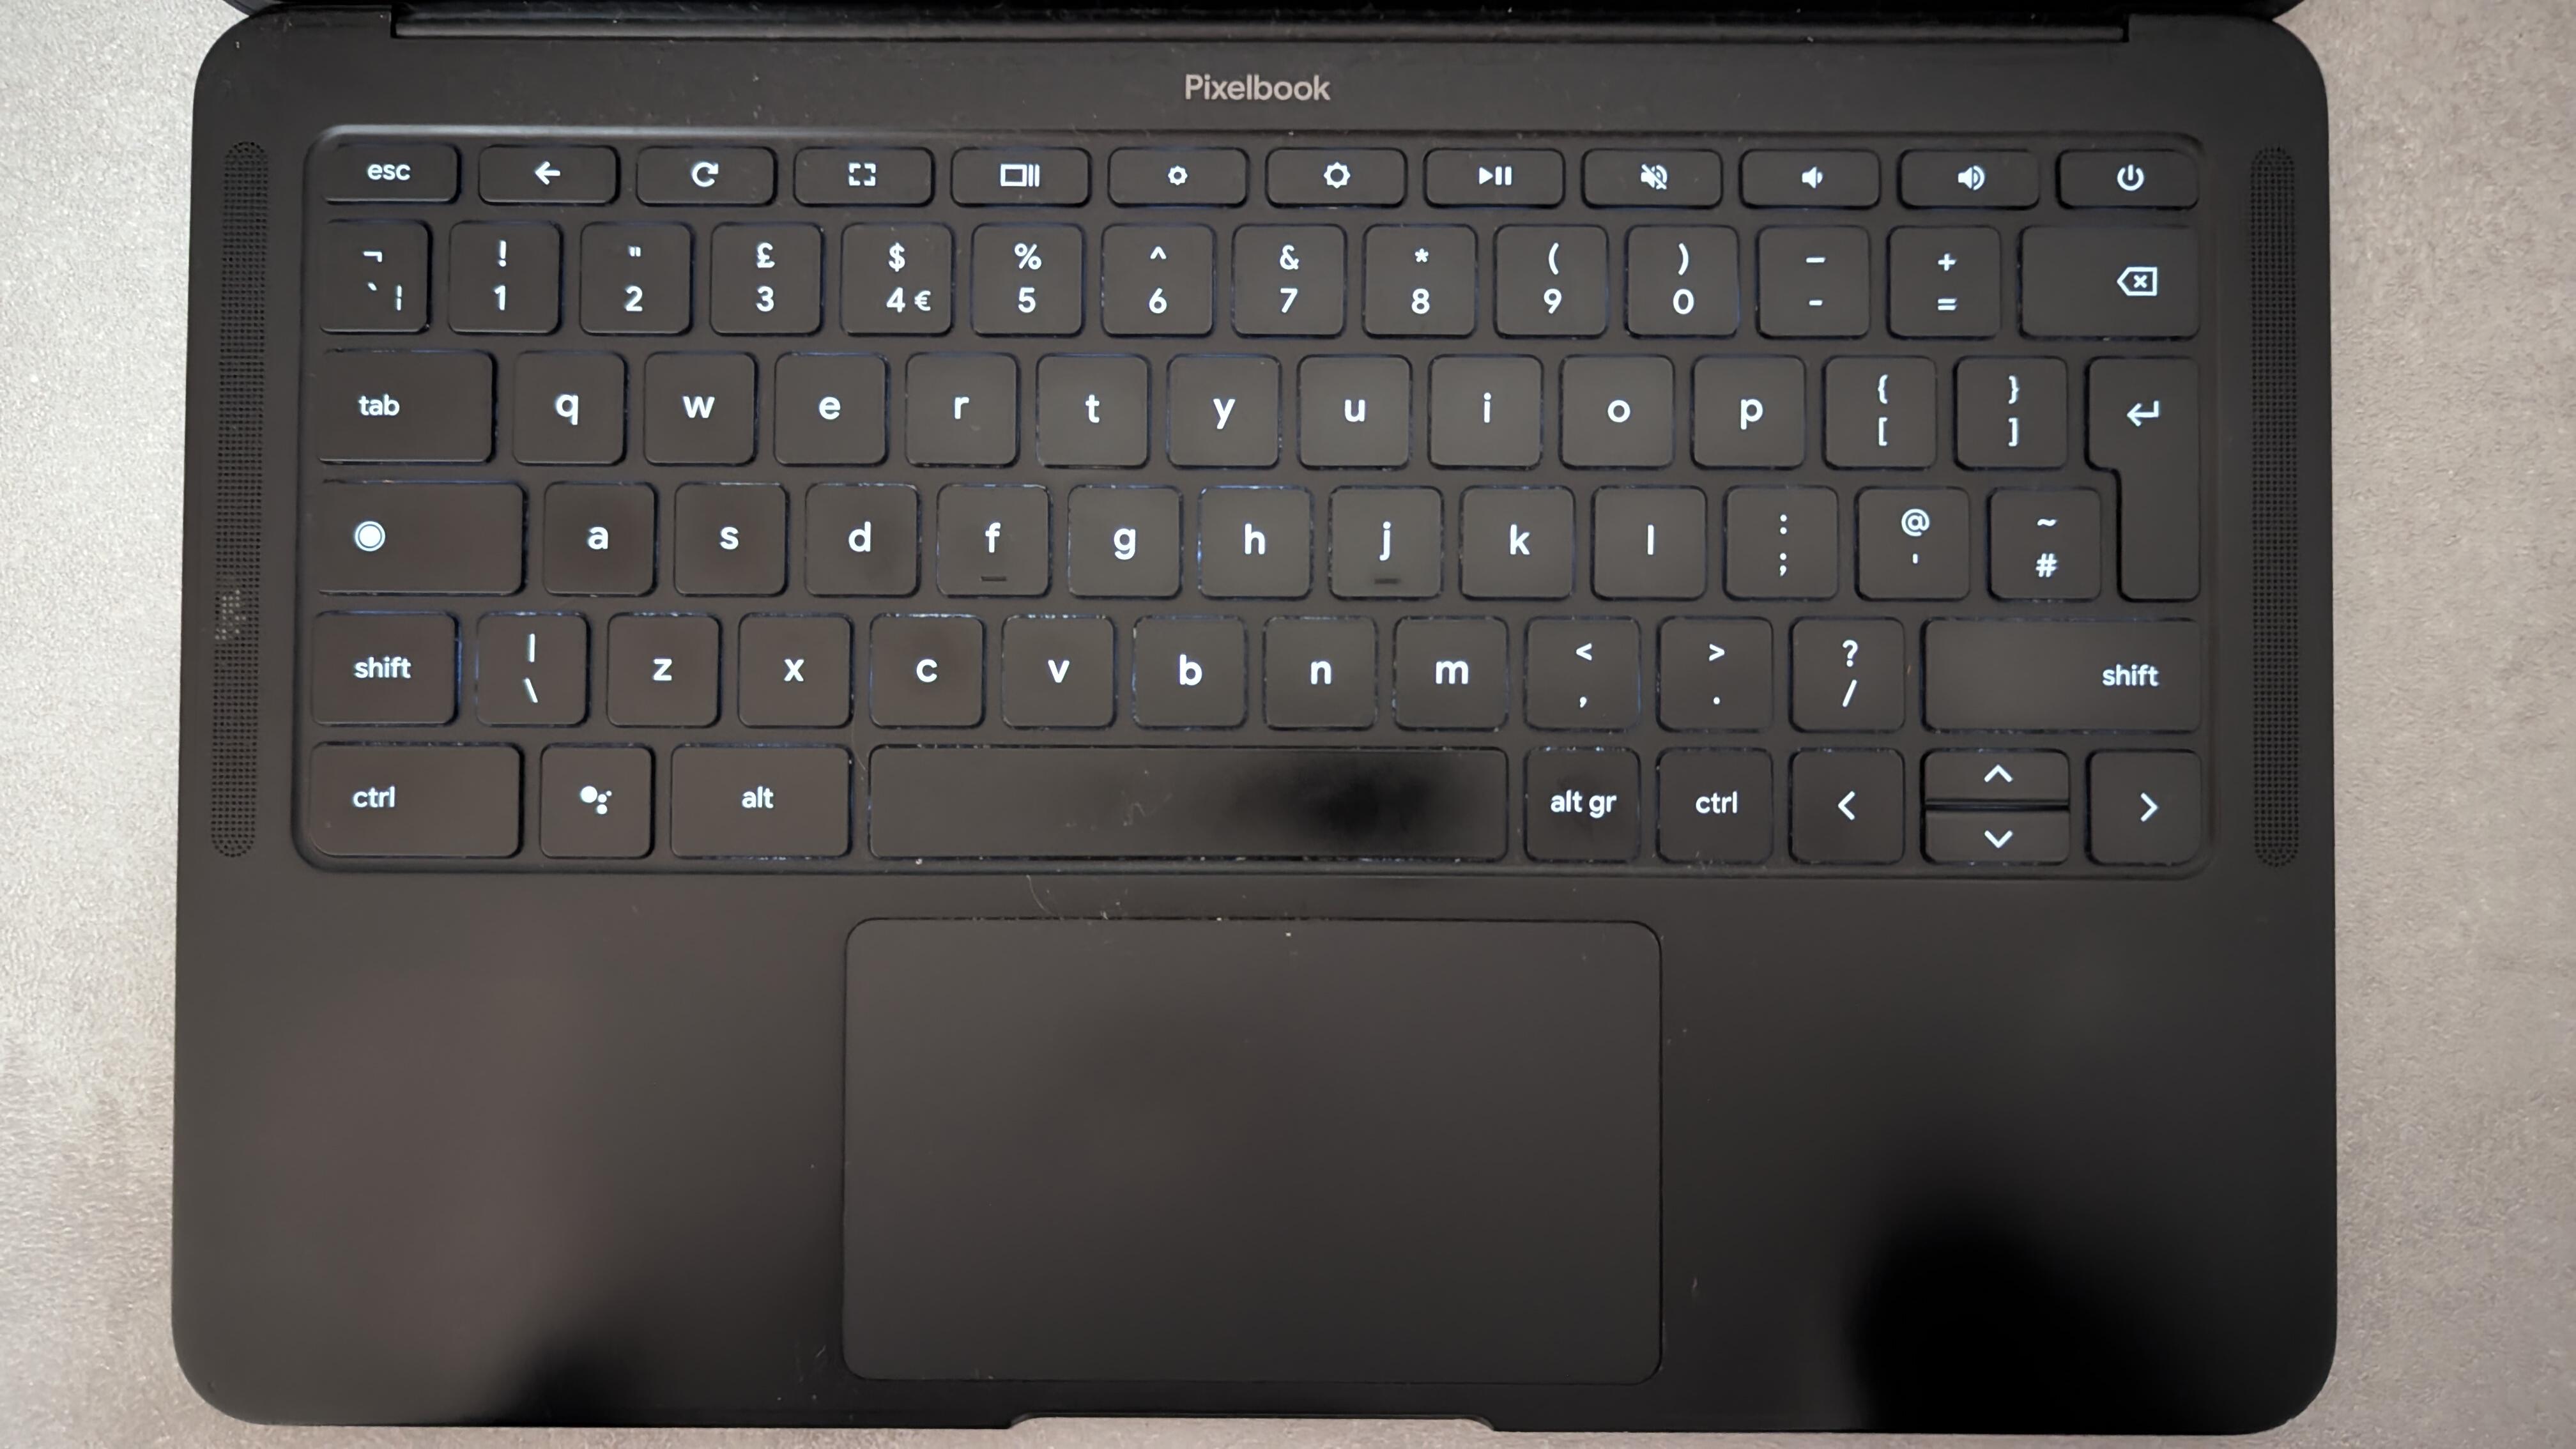
After a quick evtest, the Google Assistant key gave out the code d8, while the physical Super key gave the code db. I updated the given hwdb file to look like this:
% cat /etc/udev/hwdb.d/61-pixel-keyboard.hwdb
evdev:atkbd:dmi:bvn*:bvr*:bd*:svnGoogle:pn*:pvr*
 KEYBOARD_KEY_d8=leftmeta
 KEYBOARD_KEY_db=capslock
The project also provides a keyd configuration file to remap some of the function keys and to provide a Delete keyboard shortcut (with Alt+Backspace). The given configuration has an issue when trying to switch to a tty because the function keys aren’t properly remapped. I changed the keyd configuration file to look like this:
% cat /etc/keyd/cros.conf
[ids]
# Pixelbook and Pixelbook Go use AT Keyboard (0001:0001)
# Nocturne uses Google hammer (18d1:5030)
0001:0001
18d1:5030

[main]
f1 = back
f2 = refresh
f3 = f11
f4 = scale
f5 = brightnessdown
f6 = brightnessup
f7 = playpause
f8 = mute
f9 = volumedown
f10 = volumeup
f13 = f13

[meta]
f1 = f1
f2 = f2
f3 = f3
f4 = f4
f5 = f5
f6 = f6
f7 = f7
f8 = f8
f9 = f9
f10 = f10
f13 = f13

[control]
f3 = print

[alt]
backspace = delete
f5 = kbdillumdown
f6 = kbdillumup

[control+alt]
backspace = C-A-delete
1 = C-A-f1
2 = C-A-f2
3 = C-A-f3
4 = C-A-f4
5 = C-A-f5
6 = C-A-f6
7 = C-A-f7
f1 = C-A-f1
f2 = C-A-f2
f3 = C-A-f3
f4 = C-A-f4
f5 = C-A-f5
f6 = C-A-f6
f7 = C-A-f7
Following these little adjustments, I started using my Sway configuration and noticed that some of the keybindings with Super+Control wouldn’t work: I relaunched evtest and noticed that some of these key combinations wouldn’t produce any event.
I don’t really know what could be the precise issue here, but my best guess is that it’s an issue with the keyboard circuitry (especially because I don’t think Google thought about pressing modifier keys and Google Assistant at the same time lol).
After changing the keybinds a bit to avoid Super+Control I was finally ready to use this thing, and I’ve actually been using it as a daily driver for three weeks now!
It’s a little less powerful than my Thinkpad T490, but it’s very pleasant to use.
Wrapping up
So that’s it for this first blog post! Obviously, it was entirely written on the Pixelbook.
Other than the cable-crafting moment, it was a pretty straight forward procedure, nothing too crazy.
If you happen to find one of these machines for cheap, I think it could be a fun project to do!
Next time I’ll probably yap about some other weirder device, like the Lenovo YogaBook, which gave me way more headaches than this device.
So, now that I’ve also eaten lentils and sausages, I can finally go to sleep. Bye!